5. How to Draw with Your Computer

Video: https://youtu.be/wYofTQaIIlQ
Slides: https://slides.com/paulcraven/5-how-to-draw-with-your-computer
We’ve setup our system, learned to use git, and run our first program
using the print function. Now we are ready to start using
functions to make graphics!
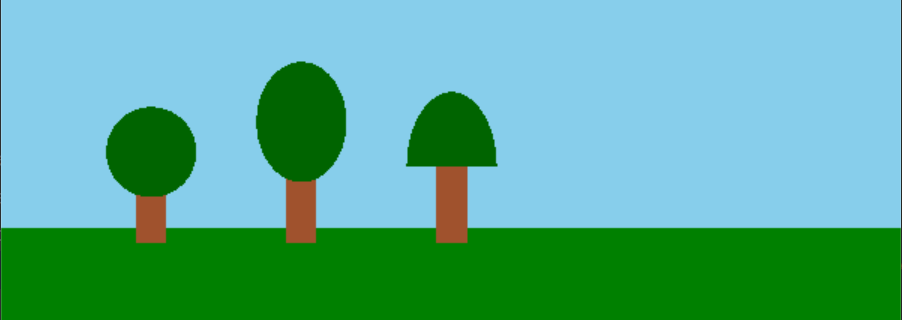
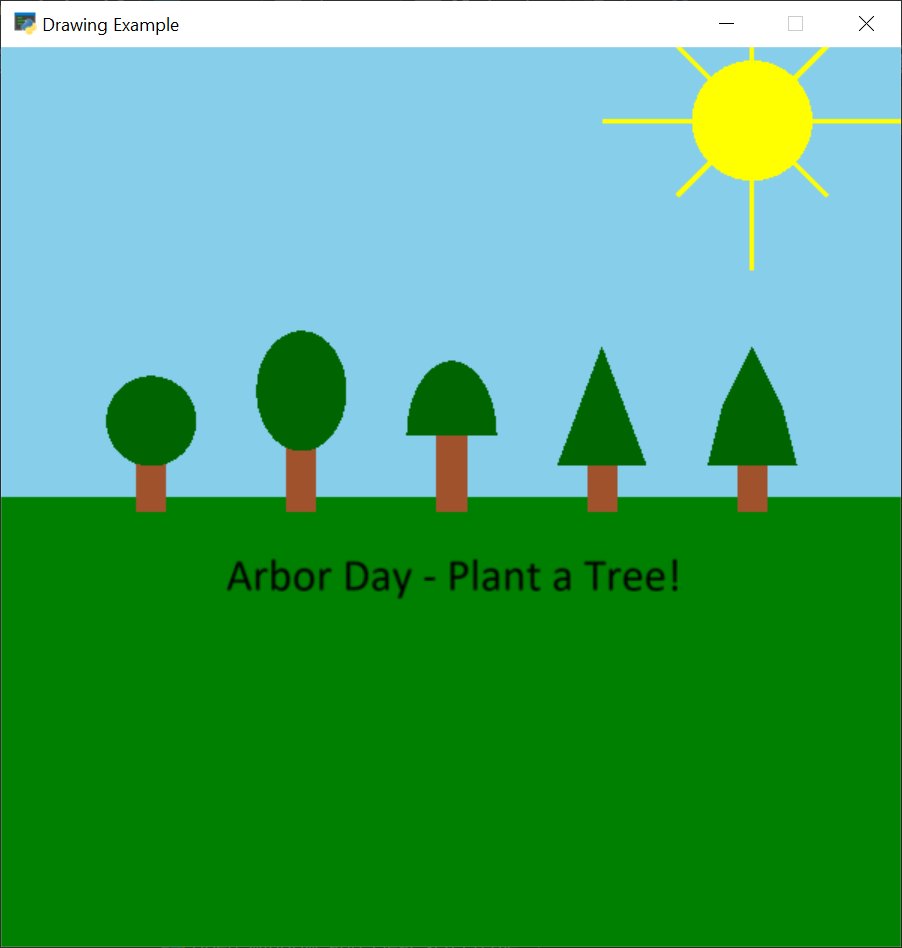
In this chapter we will learn to import a graphics library and call its functions. By the end of this chapter, you will be able to create your own art like this:
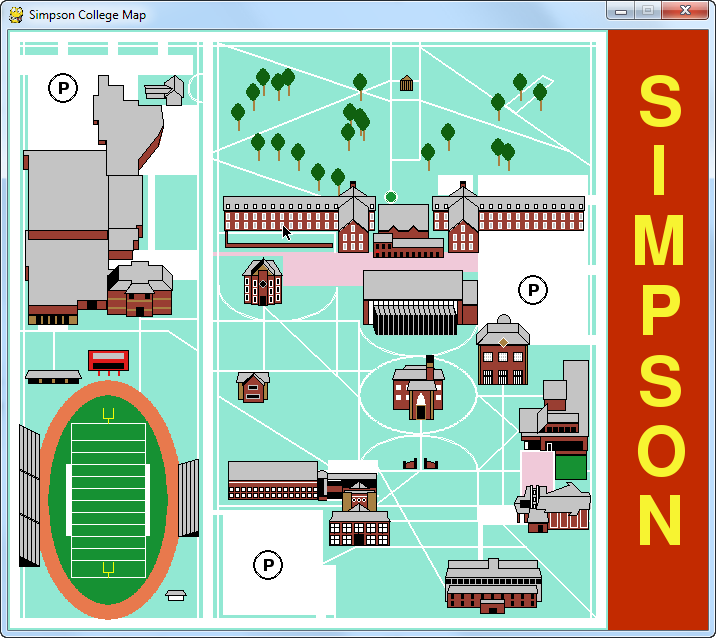
You can page through several other examples of student-created art in Übung 2: Zeichne ein Bild.
We will concentrate on learning to call functions for graphics in this chapter. The same concepts we learn here also apply to calling functions for other activities like robotics, data analytics, and web site programming.
5.1. Creating a New Program
Open up PyCharm. It should start up with the same set of project files we used last chapter. We’ll use this project for all our work in this book. Do not create new projects for each lab or program.
We are going to create a lot of code samples as we learn new concepts.
You should already have a folder called Scratch Work. We can put our code
samples there. Create a new sample by:
Right-click on
Scratch WorkClick
NewClick
Python File
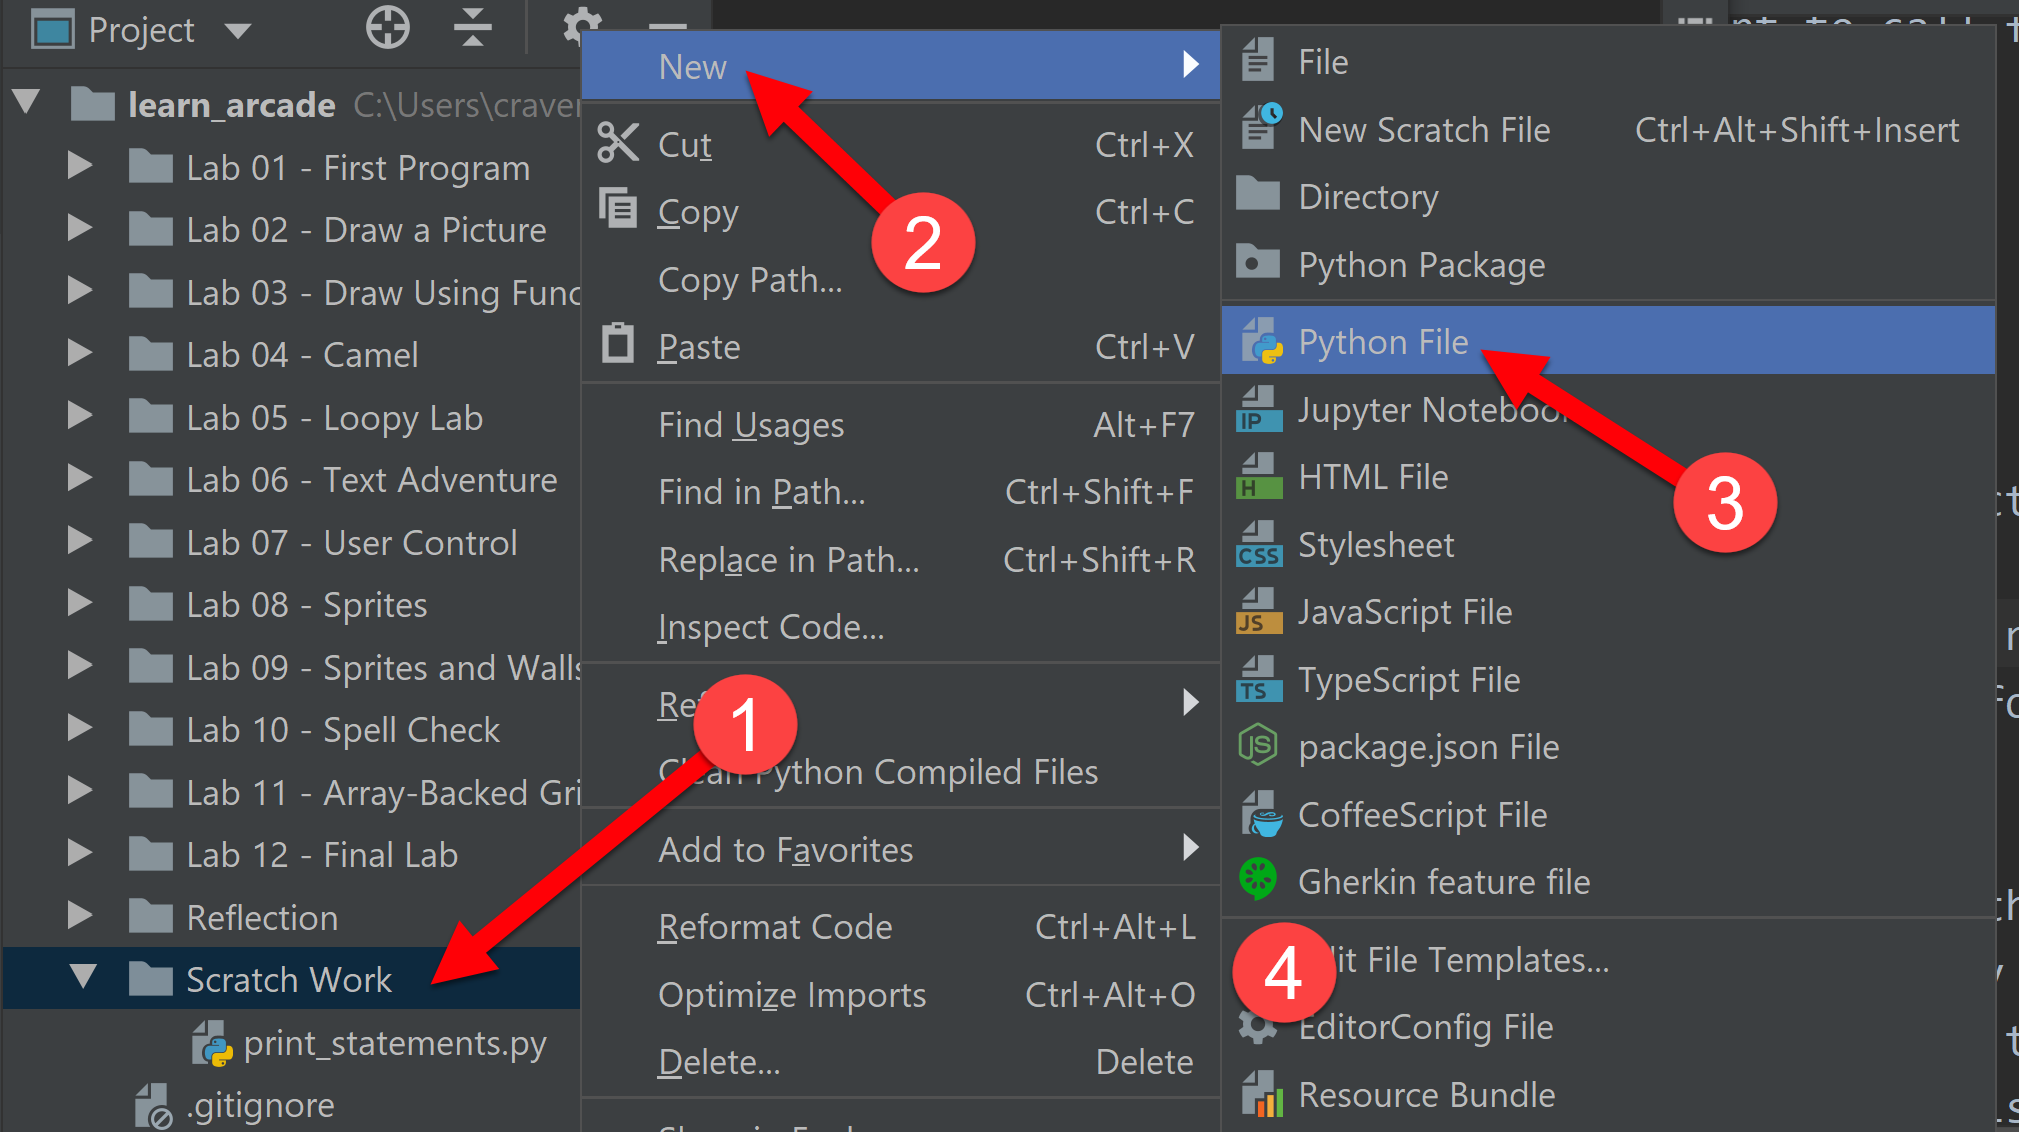
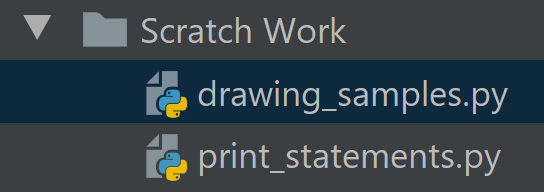
Name the file drawing_samples.py. Make sure it is inside the Scratch Work
folder. If it isn’t, drag to move it. The file should appear like the
following:
5.2. Comment Your Code
Before we start writing long programs, we need to learn about code comments. When typing in computer code, sometimes we want to be able to write things for our own benefit, and for anyone else that reads the code. Since this won’t be computer code, we need to tell the computer to ignore it.
Below are two ways of adding comments to code in the Python computer language:
1 2 3 4 5 6 7 8 9 | """
This is a sample program to show how to draw using the Python programming
language and the Arcade library.
Multi-line comments are surrounded by three double-quote marks.
Single-line comments start with a hash/pound sign. #
"""
# This is a single-line comment.
|
The Python standard is to use multi-line comments with triple quotes at the start of each source file to explain what the code does. Use single-line comments everywhere else for now.
Go ahead and try putting in your own comments.
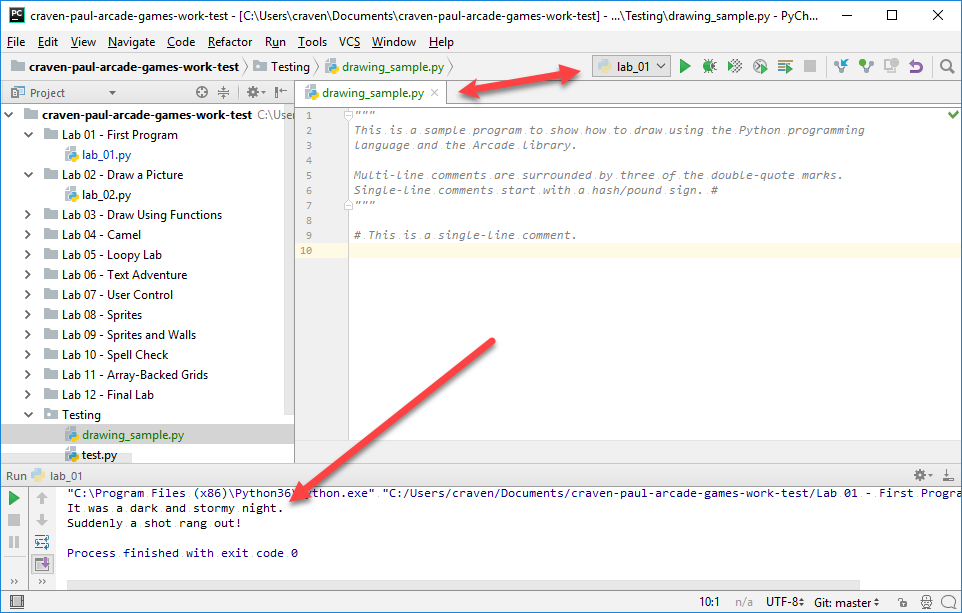
Before we run this program, we need to make
sure we are running the right program. Look at the image below. If I select
„run“ with the green arrow, I will run lab_01.py, not the program I
want to run. You need to right-click on our program and select
„Run drawing_sample.py“ instead.
Hey wait! When we finally run our program, nothing happens. That’s because the only code that we wrote were „comments.“ Comments are ignored. Therefore, there was nothing for the computer to do. Read on.
5.3. Import the Arcade Library

Before we can draw anything, we need to import a „library“ of code that has commands for drawing.
Computer languages come with a set of built-in commands. Most programs will require more commands than what the computer language loads by default. These sets of commands are called libraries. Some languages have their own special term for these libraries. In the case of Python, they are called modules. In the Python world you can use the term library and module interchangeably.
Thankfully, it is easy to import a library of code.
If we want to use the Arcade library, all we need
to do is add import arcade at the top of our program.
Achtung
Libraries should always be imported at the top of your program.
Only comments should appear ahead of an import statement.
Technically, you can put the import statement somewhere else,
just like technically you can wear a pair of shorts on your head. But
don’t. Trust me on this.
In the code below, we’ve imported the Arcade library. If you run the code, yet again nothing will happen. We’ve loaded the Arcade library, but we haven’t done anything with it yet. That’s our next step.
1 2 3 4 5 6 7 | """
This is a sample program to show how to draw using the Python programming
language and the Arcade library.
"""
# Import the "arcade" library
import arcade
|
Bemerkung
If you get an error that you can’t import the Arcade library, it hasn’t been installed for your current Python environment. Go back and follow the directions in Installing Arcade.
5.4. How to Open a Window for Drawing
The first Arcade function we are going to learn is open_window. This command opens a window with a given size and title. The code looks like the following:
arcade.open_window(600, 600, "Drawing Example")
What does each part mean?

To begin, we select the arcade library
with arcade. Then we separate the library from the function name
with a period: . Next, we put in the name of the function, open_window.
Just like the print function, we surround the function
parameters with parentheses. For example:
my_function(parameters)
If we have more than one parameter, we can use commas to separate them. PEP-8 asks that each comma is followed by a space. If we have a library, then we specify that up front. For example:
my_library.my_function(parameter_1, parameter_2)
The open_window function requires at least three parameters:
The window width in pixels.
The window height in pixels.
The text that will appear on the title bar.
In the case of width and height, the numbers specify the part of the window you can draw on. The actual window is larger to accommodate the title bar and borders. So a 600x600 window is really 602x632 if you count the title bar and borders.
How do we know open_window is the name of the function to call? How did
we know what parameters to use? The names of the functions, the order of the
parameters, is the Application Program Interface or „API“ for short. You can
click here for the entire Arcade API or go straight to the documentation
for open_window. Any decent library will have API
documentation, and
example code
to show how to use the library.
Below is an example program that will open up a window:
1 2 3 4 5 6 7 8 9 10 11 12 13 | """
This is a sample program to show how to draw using the Python programming
language and the Arcade library.
"""
# Import the "arcade" library
import arcade
# Open up a window.
# From the "arcade" library, use a function called "open_window"
# Set the dimensions (width and height)
# Set the window title to "Drawing Example"
arcade.open_window(600, 600, "Drawing Example")
|
Try running the code above. It kind-of works. If you have fast eyes, and a slow computer you might see the window pop open, then immediately close. If your computer is super-fast, you won’t see anything at all because the window opens and closes faster than your eye can process. Why does it close? Because our program is done! We’ve ran out of code to execute.
To keep the window open, we need to pause until the user hits the
close button. To do this, we’ll use the run command in the Arcade library.
The run command takes no parameters, but still needs parentheses.
1 2 3 4 5 6 7 8 9 10 11 12 13 14 15 16 | """
This is a sample program to show how to draw using the Python programming
language and the Arcade library.
"""
# Import the "arcade" library
import arcade
# Open up a window.
# From the "arcade" library, use a function called "open_window"
# Set the window title to "Drawing Example"
# Set the dimensions (width and height)
arcade.open_window(600, 600, "Drawing Example")
# Keep the window up until someone closes it.
arcade.run()
|
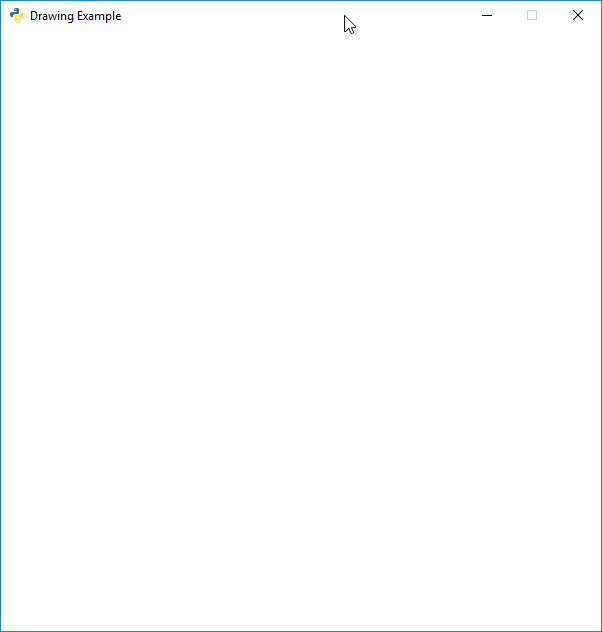
You should get a window that looks something like this:
5.5. Clearing the screen
Right now we have default white as our background.
How do we get a different color? Use the set_background_color command.
Before we can see the color, we need two more commands. These commands
tell the Arcade library when you are about to start drawing (start_render),
and when you are done drawing (finish_render).
See below:
1 2 3 4 5 6 7 8 9 10 11 12 13 14 15 16 17 18 19 20 21 22 23 24 25 26 27 | """
This is a sample program to show how to draw using the Python programming
language and the Arcade library.
"""
# Import the "arcade" library
import arcade
# Open up a window.
# From the "arcade" library, use a function called "open_window"
# Set the window title to "Drawing Example"
# Set the dimensions (width and height)
arcade.open_window(600, 600, "Drawing Example")
# Set the background color
arcade.set_background_color(arcade.csscolor.SKY_BLUE)
# Get ready to draw
arcade.start_render()
# (The drawing code will go here.)
# Finish drawing
arcade.finish_render()
# Keep the window up until someone closes it.
arcade.run()
|
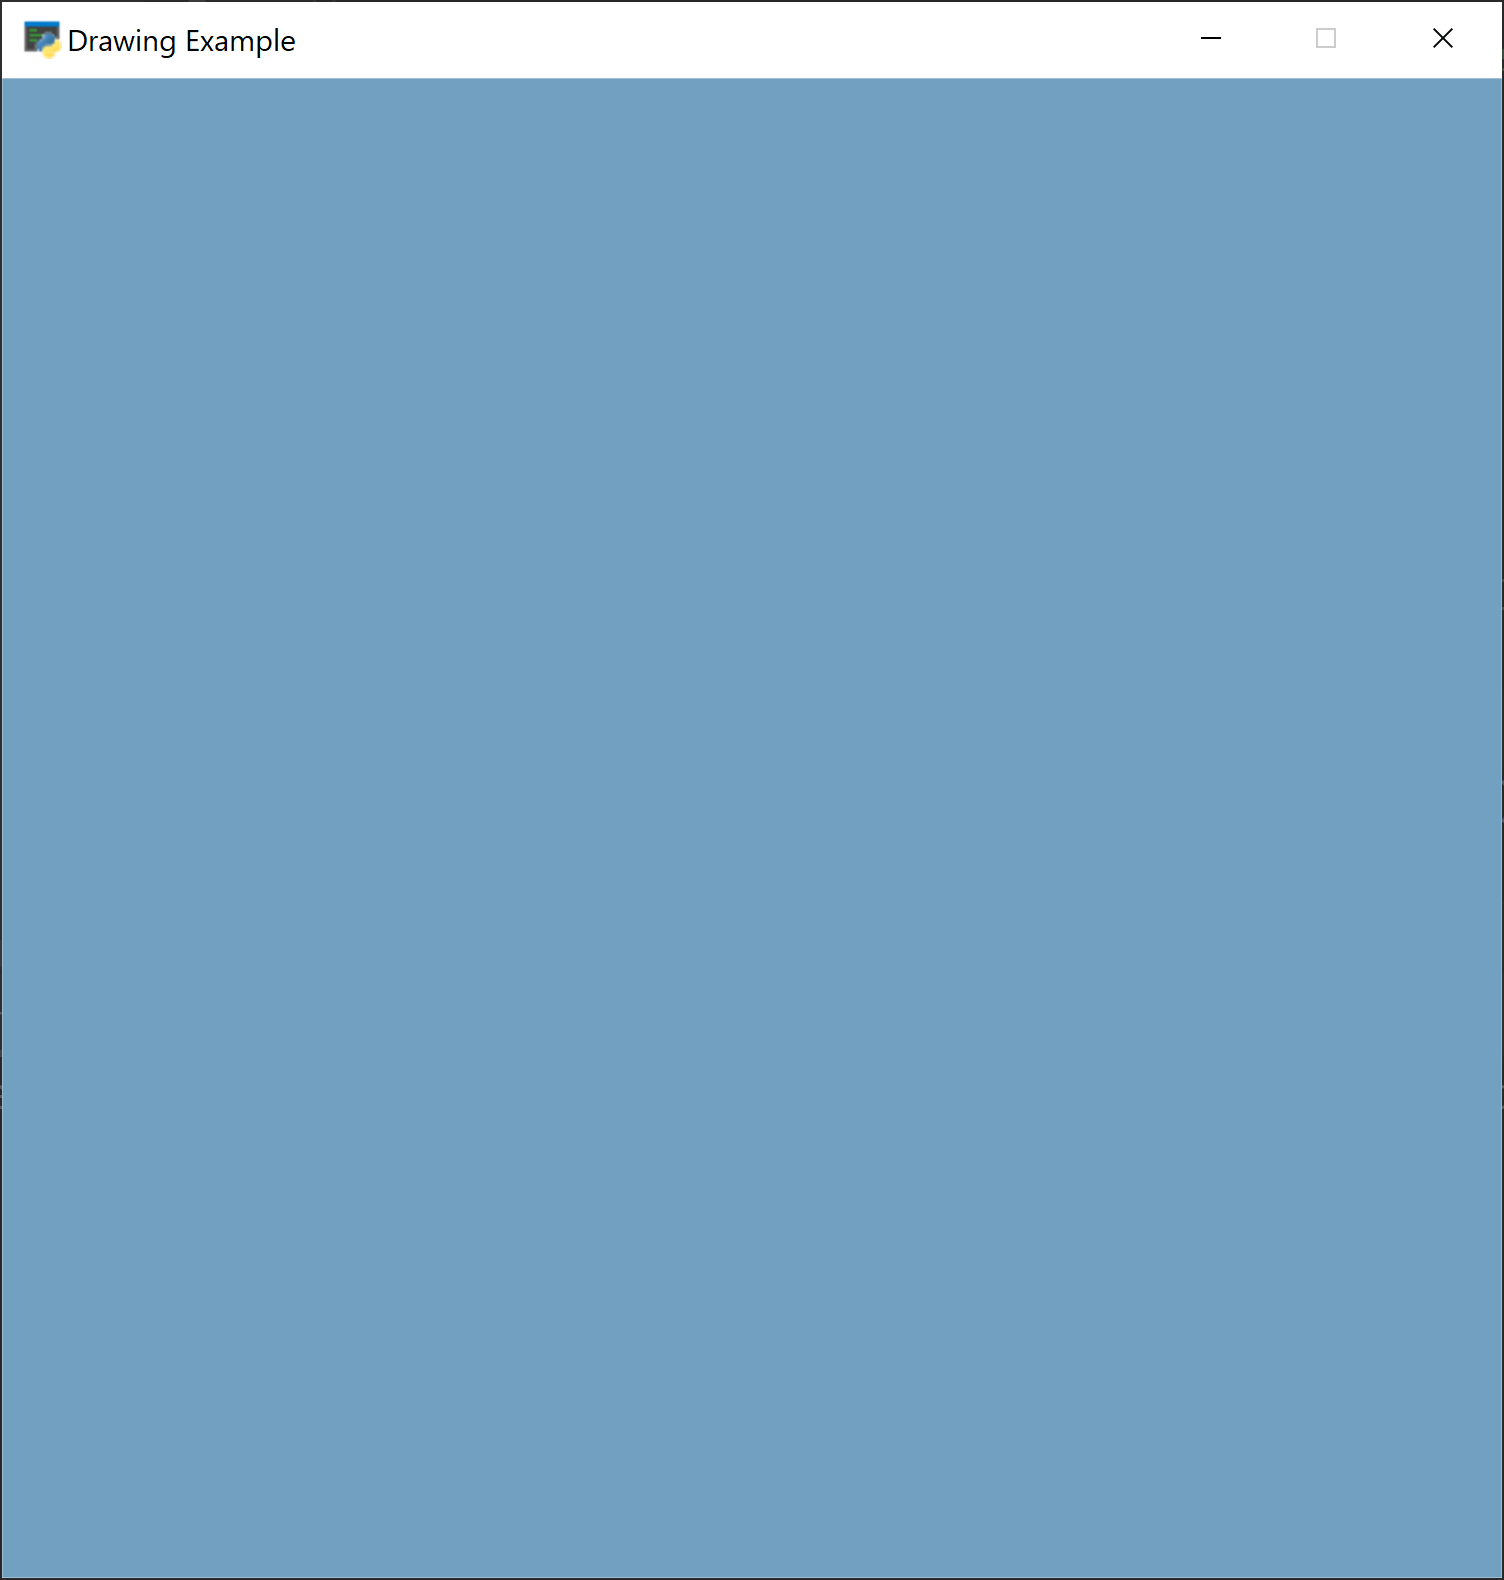
Try running the program. If everything is correct, you should get a window with a colored background.
5.6. Specifying Colors
Wait, where did arcade.csscolor.SKY_BLUE come from? How do I get to choose
the color I want? There are three ways to specify colors:
Look at the arcade.color API documentation and specify by name.
Look at the arcade.csscolor API documentation and specify by name.
Specify the RGB or RGBA color.
To specify colors by name, you can look at the color API documentation and
use something like arcade.color.AQUAMARINE in your program. Those color
names come from the ColorPicker color chart.
The colors in arcade.csscolor come from the same standard color names used in
creating web pages. Therefore, I suggest using these color names because it
will also help with web development skills.
5.6.1. RGB Values
If the color you want isn’t in the chart, or you just don’t want to use a chart, you can specify colors by „RGB“ value. RGB stands for Red, Green, and Blue.
Computers, TVs, color changing LEDs, all work by having three small lights close together. A red light, a green light, and a blue light. Turn all three lights off and you get black. Turn all three lights on and you get white. Just turn on the red, and you get red. Turn on both red and green to get yellow.
RGB based monitors work on an additive process. You start with black and add light to get color. This is different than paint or ink, which works on a subtractive process. You start with white and add to get darker colors.
Therefore, keep separate in your mind how light-based RGB color works from how paint and ink works.
We specify how much red, green, and blue to use by a number range
of 0-255. No light is zero.
Turn the light on all the way on and it is 255.
We need three numbers to specify three colors, so
(0, 0, 0) means no red,
no green, no blue. Black. Here are some other examples:
Red |
Green |
Blue |
Color |
|---|---|---|---|
0 |
0 |
0 |
Black |
255 |
255 |
255 |
White |
127 |
127 |
127 |
Gray |
255 |
0 |
0 |
Red |
0 |
255 |
0 |
Green |
0 |
0 |
255 |
Blue |
255 |
255 |
0 |
Yellow |
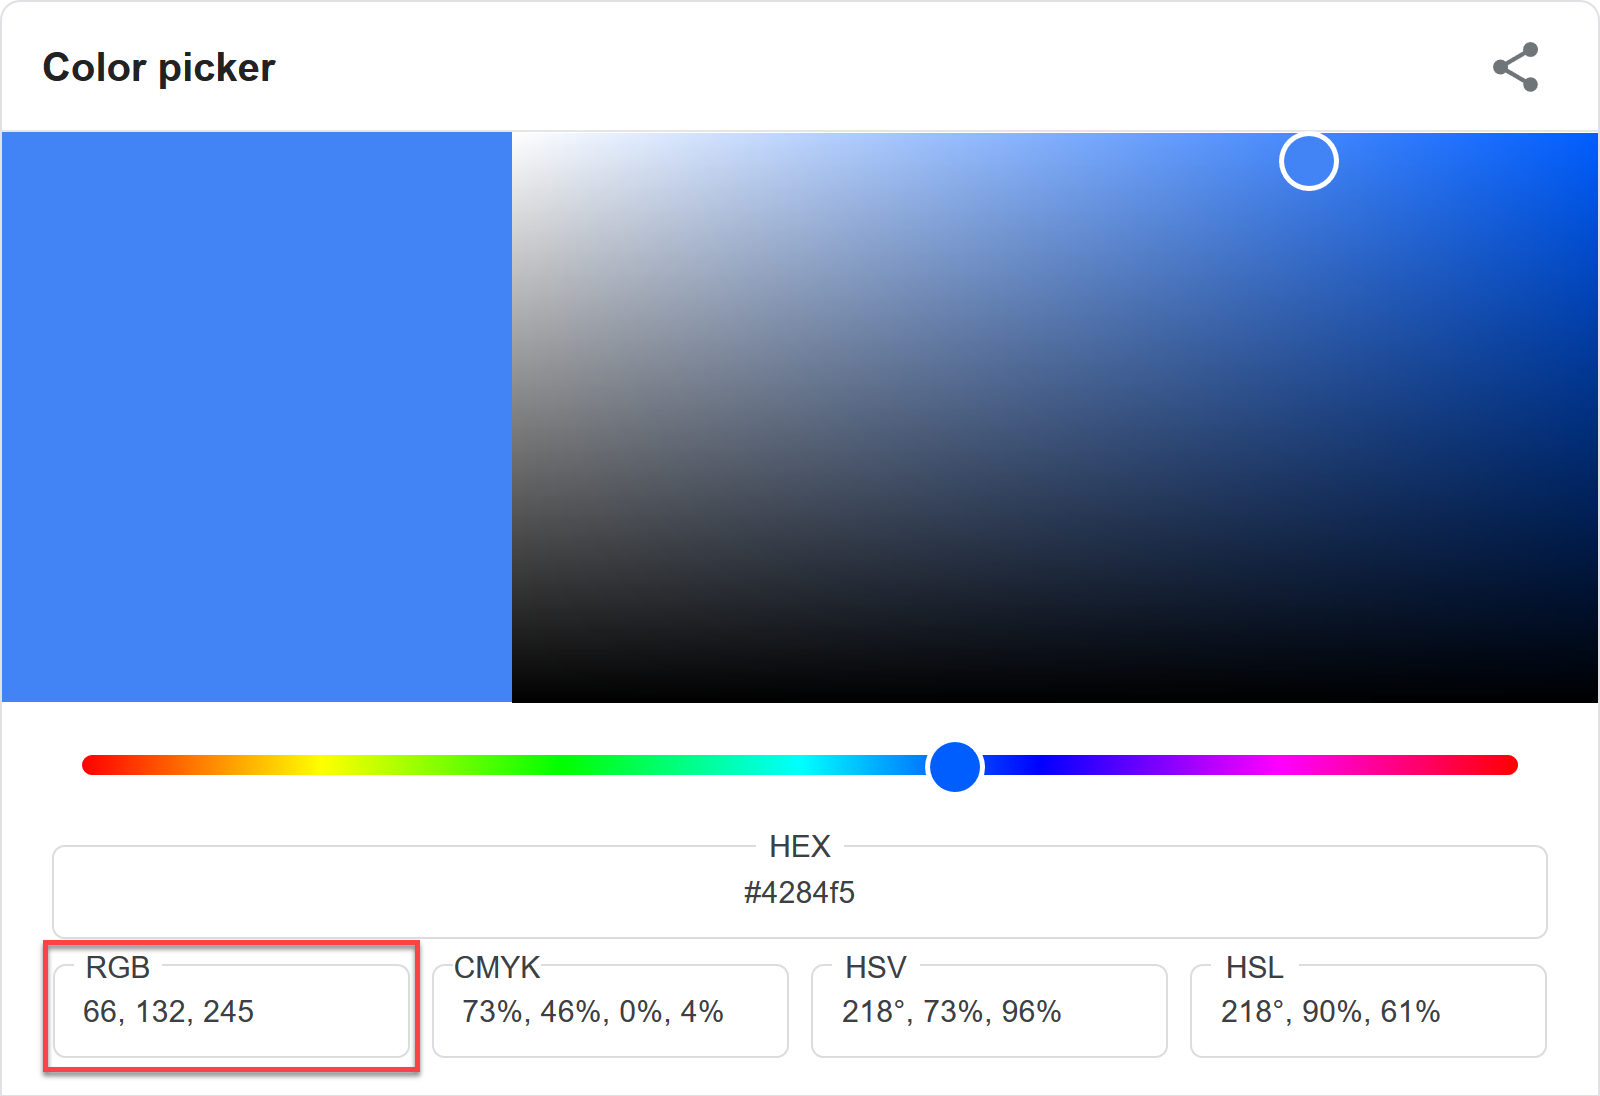
There are tools that let you easily find a color, and then get the RGB value for it. If you go to the Google search engine and type in „color picker“ it shows a nice tool for picking colors. At the bottom of the color picker, the color is shown in hex, CMYK, and several other formats. Remember, we want the RGB value.
After getting the RGB value, specify the color as a set of three numbers surrounded by parenthesis, like the following code:
arcade.set_background_color((189, 55, 180))
In addition to RGB, you can also specify the „Alpha“ with an RGBA value. The „Alpha Channel“ controls how transparent the color is. If you draw a square with an alpha of 255, it will be solid and hide everything behind it. An alpha of 127 will be in the middle, you will see some of the items behind the square. An alpha of 0 is completely transparent and you’ll see nothing of the square.
5.6.2. What is a Byte?
Notice how the color values go between 0 and 255? That’s strange. Why 255? Why not 100? Why not 1000? This requires an explanation of a very important concept of how computers handle numbers.
You may have heard that computers think in 1’s and 0’s. That’s true. Everything to the computer is a switch. If there is electricity, we have a 1. If there is no electricity we have a 0. Every 1 and 0 is called a bit. We can store those bits in memory.
How do we go from 1’s and 0’s to numbers we normally use? We group these 1’s and 0’s together to form binary numbers. These combinations of 1’s and 0’s work like combinations of the digits 0-9 used to form the base-10 numbers we are used to. Like this:
Binary - Base 2 |
Base 10 |
|---|---|
0000 |
0 |
0001 |
1 |
0010 |
2 |
0011 |
3 |
0100 |
4 |
0101 |
5 |
0110 |
6 |
0111 |
7 |
1000 |
8 |
See the pattern? It is the same pattern we use when we count as a kid. As a kid we learned to go 0 to 9, then when we hit 9 we go back to 0 and add one to the ten’s place. Here we only have 0 to 1 instead of 0 to 9. And instead of a „ten’s place“ we have a „two’s place.“
You might have used „bases“ in math class long ago. Computers work in Base-2 because they only have two ways to count, on or off. Humans think in Base-10 because we have 10 fingers.
Numbers are stored in bytes. A byte is a set of eight bits. If we were to follow the pattern we started above, the largest number we could store with eight 1’s and 0’s is:
1111 1111
In Base-10 this is 255.
Let’s use some math. We have 8 ones and zeros. That give us 2 8 = 256 possible combinations. Each combination is a different number. Since zero a counts as a number, that makes the biggest number 255.
If we had 16 bits, then we’d have 2 16 = 65,536 possible combinations. Or a number from 0-65,535. A 32-bit computer can hold numbers up to 2 32 = 4,294,967,296. A 64-bit computer can hold really large numbers!
So because a computer holds colors with one byte for red, one for green, and one for blue, each color has a value range from 0 - 255.
5.7. The Coordinate System
We’ve learned to specify the color of what we want to draw, the next thing we need to learn is how to position it. In your math classes, you’ve probably learned about the Cartesian coordinate system, which looks like this:

.svg)
Our graphics will be drawn using this same system. But there are additional things to keep in mind:
We will only draw in the upper right quadrant. So 0,0 will be in the lower left of the screen, and all negative coordinates will be off-screen.
Each „point“ will be a pixel. So a window that is 800 pixels wide, will have x-coordinates that run from 0 to 799. (Zero is one of the pixels, so 0-799 is 800 pixels. Off-by-one errors are very common in computing.)
5.8. Drawing
Arcade has „drawing primitives“ that allow you to create rectangles, circles, arcs, lines, and text.
5.8.1. Drawing Rectangles
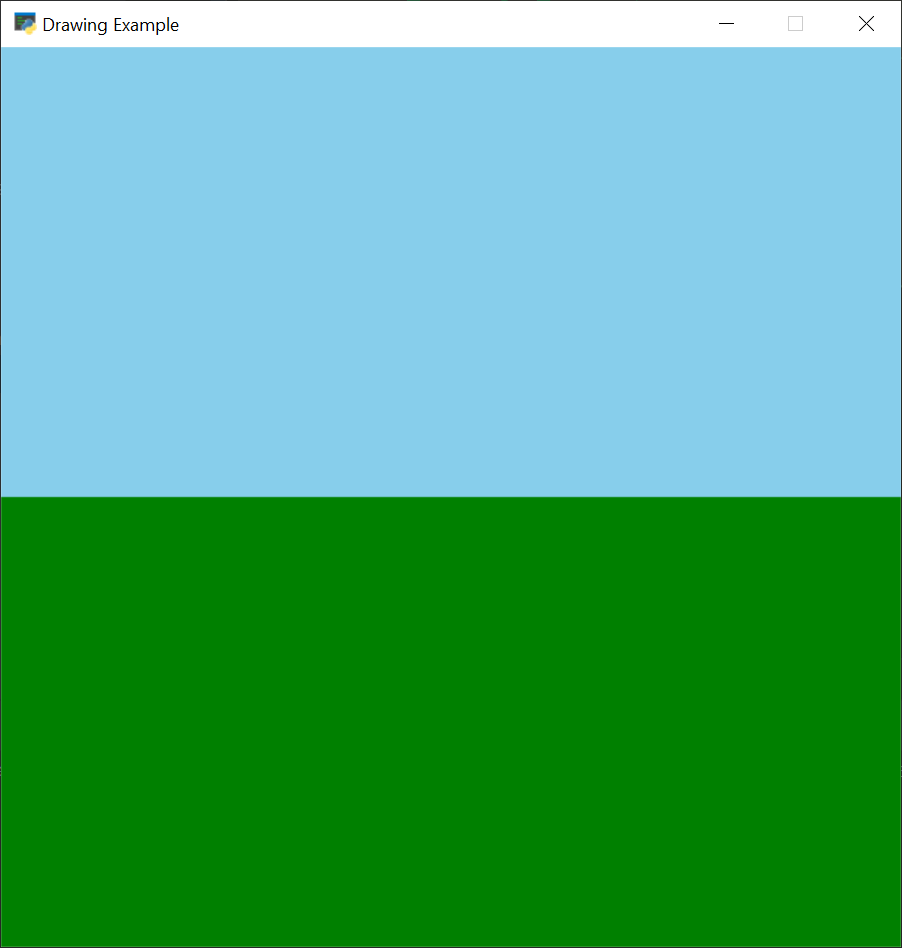
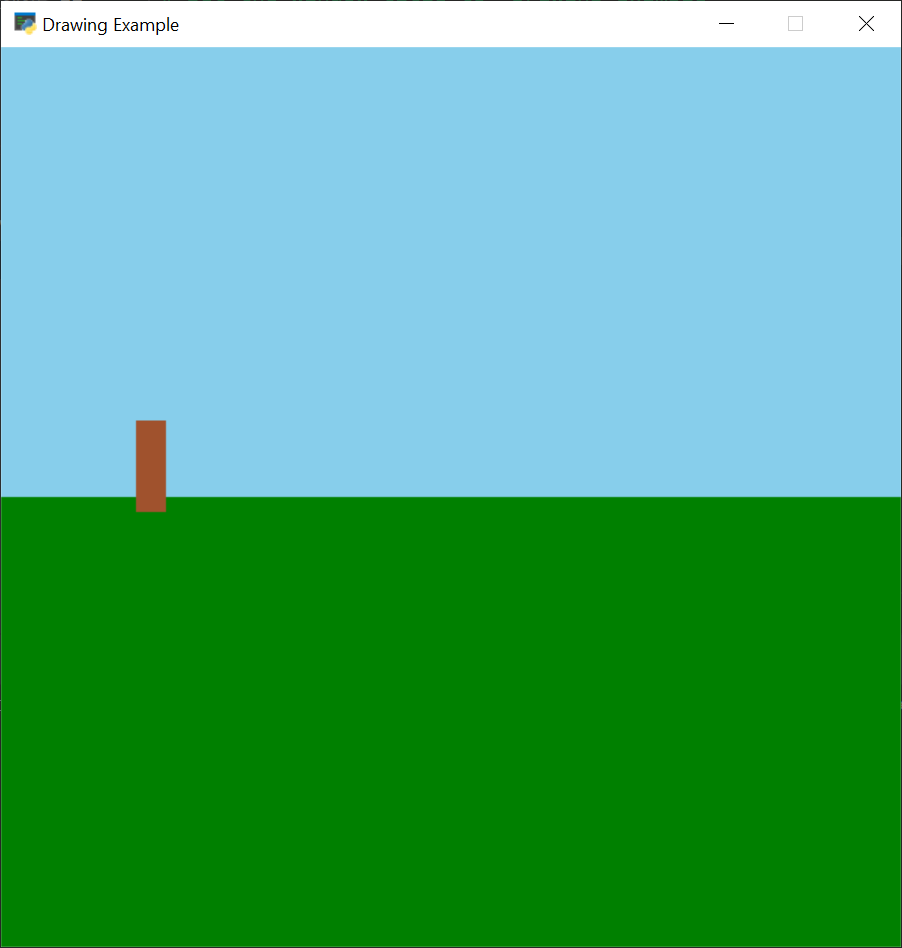
Our screen currently has a sky-blue color. Let’s draw a rectangle in the bottom half of the screen and make that a grass color.
The function we will use is draw_lrtb_rectangle_filled. It stands for „draw left-right-top-bottom rectangle“.
To make the bottom half of our screen green grass, we’ll start
with a left of 0, a right of 599, a top of 300, and a bottom of zero.
The order of the statements is important, make sure you put in your command
after the start_render and before the finish_render.
1 2 3 4 5 6 7 8 9 10 11 12 13 14 15 16 17 18 19 20 21 22 23 24 25 26 27 28 29 30 | """
This is a sample program to show how to draw using the Python programming
language and the Arcade library.
"""
# Import the "arcade" library
import arcade
# Open up a window.
# From the "arcade" library, use a function called "open_window"
# Set the window title to "Drawing Example"
# Set the dimensions (width and height)
arcade.open_window(600, 600, "Drawing Example")
# Set the background color
arcade.set_background_color(arcade.csscolor.SKY_BLUE)
# Get ready to draw
arcade.start_render()
# Draw a rectangle
# Left of 0, right of 599
# Top of 300, bottom of 0
arcade.draw_lrtb_rectangle_filled(0, 599, 300, 0, arcade.csscolor.GREEN)
# Finish drawing
arcade.finish_render()
# Keep the window up until someone closes it.
arcade.run()
|
Your window should look like this:
Sometimes we don’t want to specify a rectangle by left-right-top-bottom. There is also an option to specify it by center x, center y, width, and height using the draw_rectangle_filled function. For example this code displays a tree trunk:
# Tree trunk
# Center of 100, 320
# Width of 20
# Height of 60
arcade.draw_rectangle_filled(100, 320, 20, 60, arcade.csscolor.SIENNA)
There’s also a function to draw the outline of a rectangle called draw_rectangle_outline. Both of these functions (and many others) have an optional parameter to tilt the rectangle to a desired angle.
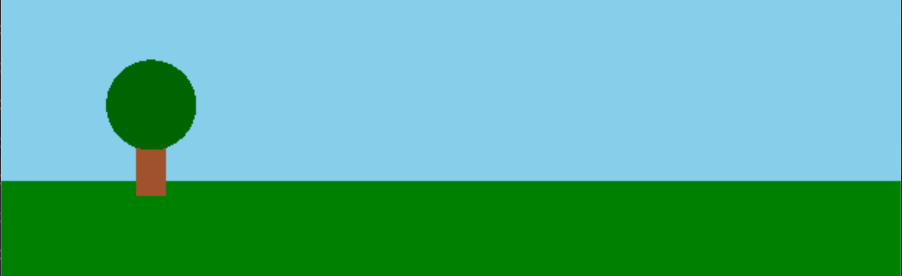
5.8.2. Drawing Circles
We can draw a circle with draw_circle_filled. This code will draw a circle with a center of 100, 350 and a radius of 30 pixels.
# Tree top
arcade.draw_circle_filled(100, 350, 30, arcade.csscolor.DARK_GREEN)
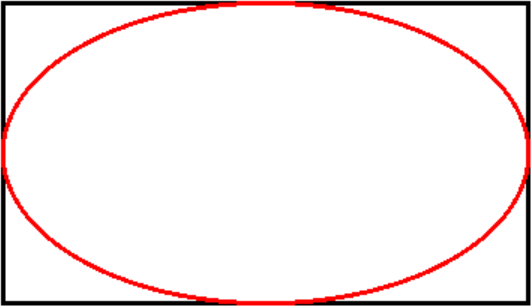
5.8.3. Drawing Ellipses
If you don’t want a perfect circle, you can draw a ellipse. Ellipses are drawn like rectangles. The „rectangle“ forms the bounds of the ellipse that’s drawn inside it. Examine this code sample:
# Draw an ellipse and rect with
# a center of (300, 300)
# width of 350
# height of 200
arcade.draw_rectangle_outline(300, 300, 350, 200, arcade.csscolor.BLACK, 3)
arcade.draw_ellipse_outline(300, 300, 350, 200, arcade.csscolor.RED, 3)
Now look at what it draws to understand the relation between the rectangle and ellipse.
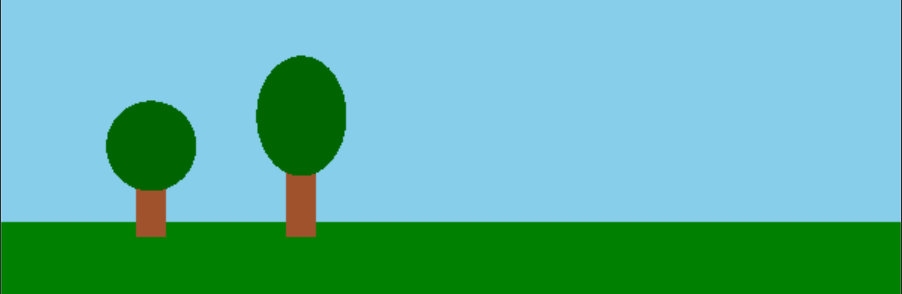
With the draw_ellipse_filled function we can make a tree out of a tall
ellipse for the top:
# Another tree, with a trunk and ellipse for top
arcade.draw_rectangle_filled(200, 320, 20, 60, arcade.csscolor.SIENNA)
arcade.draw_ellipse_filled(200, 370, 60, 80, arcade.csscolor.DARK_GREEN)
5.8.4. Drawing Arcs
You can draw an arc with draw_arc_filled. Drawing an arc works just like an ellipse, with the additional parameters for a start angle and an end angle.
# Another tree, with a trunk and arc for top
# Arc is centered at (300, 340) with a width of 60 and height of 100.
# The starting angle is 0, and ending angle is 180.
arcade.draw_rectangle_filled(300, 320, 20, 60, arcade.csscolor.SIENNA)
arcade.draw_arc_filled(300, 340, 60, 100, arcade.csscolor.DARK_GREEN, 0, 180)
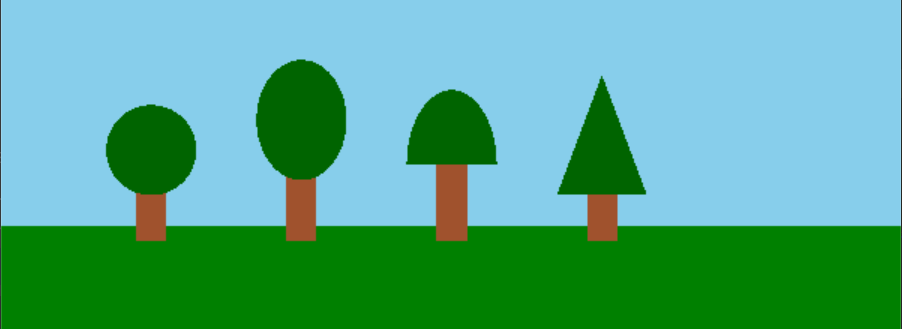
5.8.5. Triangles
Triangles are drawn by specifying the coordinates of each point with draw_triangle_filled. That requires a bit of thought about where each point goes. I often end up sketching it out on paper to get it straight. This can be used to make a pine tree.
# Another tree, with a trunk and triangle for top
# Triangle is made of these three points:
# (400, 400), (370, 320), (430, 320)
arcade.draw_rectangle_filled(400, 320, 20, 60, arcade.csscolor.SIENNA)
arcade.draw_triangle_filled(400, 400, 370, 320, 430, 320, arcade.csscolor.DARK_GREEN)
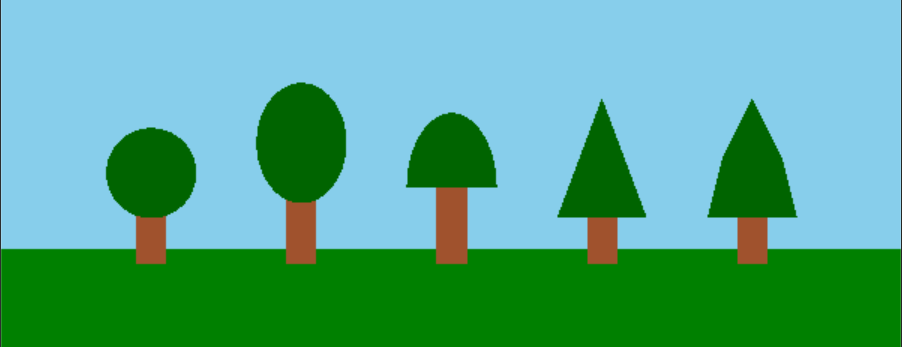
5.8.6. Polygons
Polygons are drawn with a list of points and the draw_polygon_filled function. In this example we use five points to create a tree-top.
# Draw a tree using a polygon with a list of points
arcade.draw_rectangle_filled(500, 320, 20, 60, arcade.csscolor.SIENNA)
arcade.draw_polygon_filled(((500, 400),
                            (480, 360),
                            (470, 320),
                            (530, 320),
                            (520, 360)
                            ),
                           arcade.csscolor.DARK_GREEN)
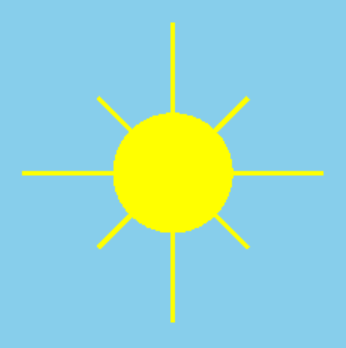
5.8.7. Lines
Line drawing with the draw_line function involves specifying a start point and and end point. Optionally, you can specify the line width. You can also use draw_line_strip to draw a continuous multi-point line.
In our sample image, we’ll use several lines to draw rays coming out of a sun:
# Draw a sun
arcade.draw_circle_filled(500, 550, 40, arcade.color.YELLOW)

# Rays to the left, right, up, and down
arcade.draw_line(500, 550, 400, 550, arcade.color.YELLOW, 3)
arcade.draw_line(500, 550, 600, 550, arcade.color.YELLOW, 3)
arcade.draw_line(500, 550, 500, 450, arcade.color.YELLOW, 3)
arcade.draw_line(500, 550, 500, 650, arcade.color.YELLOW, 3)

# Diagonal rays
arcade.draw_line(500, 550, 550, 600, arcade.color.YELLOW, 3)
arcade.draw_line(500, 550, 550, 500, arcade.color.YELLOW, 3)
arcade.draw_line(500, 550, 450, 600, arcade.color.YELLOW, 3)
arcade.draw_line(500, 550, 450, 500, arcade.color.YELLOW, 3)
5.8.8. Text
Text can be drawn with the draw_text command.
Just like with the print function, text must be enclosed in quotes.
The text to draw is the first parameter. The x, y location of the text is
are next two. Finally the color and font size come next.
# Draw text at (150, 230) with a font size of 24 pts.
arcade.draw_text("Arbor Day - Plant a Tree!",
                 150, 230,
                 arcade.color.BLACK, 24)

5.8.9. Full Example Drawing Program
Here’s the full code for our example drawing program.
1 2 3 4 5 6 7 8 9 10 11 12 13 14 15 16 17 18 19 20 21 22 23 24 25 26 27 28 29 30 31 32 33 34 35 36 37 38 39 40 41 42 43 44 45 46 47 48 49 50 51 52 53 54 55 56 57 58 59 60 61 62 63 64 65 66 67 68 69 70 71 72 73 74 75 76 77 78 79 80 81 82 | """
This is a sample program to show how to draw using the Python programming
language and the Arcade library.
"""
# Import the "arcade" library
import arcade
# Open up a window.
# From the "arcade" library, use a function called "open_window"
# Set the window title to "Drawing Example"
# Set the dimensions (width and height)
arcade.open_window(600, 600, "Drawing Example")
# Set the background color
arcade.set_background_color(arcade.csscolor.SKY_BLUE)
# Get ready to draw
arcade.start_render()
# Draw a rectangle
# Left of 0, right of 599
# Top of 300, bottom of 0
arcade.draw_lrtb_rectangle_filled(0, 599, 300, 0, arcade.csscolor.GREEN)
# Tree trunk
arcade.draw_rectangle_filled(100, 320, 20, 60, arcade.csscolor.SIENNA)
# Tree top
arcade.draw_circle_filled(100, 350, 30, arcade.csscolor.DARK_GREEN)
# Another tree, with a trunk and ellipse for top
arcade.draw_rectangle_filled(200, 320, 20, 60, arcade.csscolor.SIENNA)
arcade.draw_ellipse_filled(200, 370, 60, 80, arcade.csscolor.DARK_GREEN)
# Another tree, with a trunk and arc for top
# Arc is centered at (300, 340) with a width of 60 and height of 100.
# The starting angle is 0, and ending angle is 180.
arcade.draw_rectangle_filled(300, 320, 20, 60, arcade.csscolor.SIENNA)
arcade.draw_arc_filled(300, 340, 60, 100, arcade.csscolor.DARK_GREEN, 0, 180)
# Another tree, with a trunk and triangle for top
# Triangle is made of these three points:
# (400, 400), (370, 320), (430, 320)
arcade.draw_rectangle_filled(400, 320, 20, 60, arcade.csscolor.SIENNA)
arcade.draw_triangle_filled(400, 400, 370, 320, 430, 320, arcade.csscolor.DARK_GREEN)
# Draw a tree using a polygon with a list of points
arcade.draw_rectangle_filled(500, 320, 20, 60, arcade.csscolor.SIENNA)
arcade.draw_polygon_filled(((500, 400),
(480, 360),
(470, 320),
(530, 320),
(520, 360)
),
arcade.csscolor.DARK_GREEN)
# Draw a sun
arcade.draw_circle_filled(500, 550, 40, arcade.color.YELLOW)
# Rays to the left, right, up, and down
arcade.draw_line(500, 550, 400, 550, arcade.color.YELLOW, 3)
arcade.draw_line(500, 550, 600, 550, arcade.color.YELLOW, 3)
arcade.draw_line(500, 550, 500, 450, arcade.color.YELLOW, 3)
arcade.draw_line(500, 550, 500, 650, arcade.color.YELLOW, 3)
# Diagonal rays
arcade.draw_line(500, 550, 550, 600, arcade.color.YELLOW, 3)
arcade.draw_line(500, 550, 550, 500, arcade.color.YELLOW, 3)
arcade.draw_line(500, 550, 450, 600, arcade.color.YELLOW, 3)
arcade.draw_line(500, 550, 450, 500, arcade.color.YELLOW, 3)
# Draw text at (150, 230) with a font size of 24 pts.
arcade.draw_text("Arbor Day - Plant a Tree!",
150, 230,
arcade.color.BLACK, 24)
# Finish drawing
arcade.finish_render()
# Keep the window up until someone closes it.
arcade.run()
|
5.9. Specifying Parameters By Name
It can be confusing to track a lot of parameters given to a function. For example, here’s a call to draw_arc_outline.
arcade.draw_arc_outline(300,
                        340,
                        60,
                        100,
                        arcade.csscolor.BLACK,
                        0,
                        180,
                        3,
                        45)
It is not easy to track what number goes with what parameter. Yes, the parameters have an order to them. But unless a programmer memorizes every order of every function, you can’t quickly tell.
Parameters each have a parameter name which can be found in the documentation. We can use that name to specify each value given to a function. This may take some additional up-front coding time, but the increased readability may save time later.
arcade.draw_arc_outline(center_x=300,
                        center_y=340,
                        width=60,
                        height=100,
                        color=arcade.csscolor.BLACK,
                        start_angle=0,
                        end_angle=180,
                        border_width=3,
                        tilt_angle=45)
5.10. Future Improvements
Looking forward, there’s a lot we can do to improve this code.
In Variablen und Ausdrücke we’ll learn to use variables to store our parameter values
which will enhance the readability of our program, while giving us more
flexibility to update our item’s positioning. In Zeichnen mit Funktionen we’ll
create our own functions. That will allow us to create a function like draw_tree.
5.10.1. Improving Graphics Performance
If you create awesome graphics using these commands, you might find later when creating a game that drawing graphics in this manner is very slow. Computers redraw the screen about 60 times every second. Complex drawings can have hundreds or thousands of points of data to draw. Multiply that by 60, and it is quite a bit for even fast computers to handle.
To speed graphics, computers have separate processors to handle the display. To use those separate processors we need to draw in two steps. First, the computer will collect a batch of points, colors, and drawing information together. Then it will send all of that information to the graphic processors. If you’ve experienced a long pause between levels when playing a game, this is what’s happening.
After the graphics information is sent to the graphic processors, anytime our program wants to draw a tree, house, or rainbow unicorn, it tells the graphic processors simply ‚draw the unicorn‘ rather than resend all the individual drawing commands.
As we progress through the class, if you find your drawing commands to get too slow, keep this in mind. The Arcade library supports batch drawing with sprites and shape lists. We’ll cover how do do this in future chapters.
5.11. Real-World Applications
We aren’t limited to the Arcade library and its API. Here are a few other APIs to give you an idea of what’s out there.
OpenPyXL for creating and processing spreadsheets.
CircuitPython has a set of libraries for controlling LEDs, motors, displays, and robotic servos.
NumPy is a powerful library for working on anything related to linear algebra.
Beautiful Soup is a library that allows your program to automatically download pages off the web and process the data in them.
5.12. Review
In this chapter we learned how to import a Python module. We learned to call functions from an imported module. While we are learning how to do graphics in this chapter, these same skills can be used for importing and calling libraries of code that manage spreadsheets, images, robotics, and more.
Colors can be specified in RGB format and are stored in bytes. Each byte is a group of eight bits, and can hold numbers from 0-255.
We learned how do draw ellipses, arcs, rectangles, triangles, polygons, lines and text. More importantly we learned how to look up these functions out of the API documentation.
5.12.1. Review Questions
In Python, a library of code is called what?
What do we call a line of code in Python which includes the function name, parentheses, numbers, text and everything else required perform an operation?
When we call a function that is inside a library, what character do we use to separate the library name and the function name?
According to PEP-8, should we put a space after a comma that separates parameters?
What function is used to open a window? Just list the function name, don’t include the library or parameters.
What do we call the names of the functions and parameter order that make up how we interface with a library?
What function name sets the background colors?
What function name must happen before you start drawing?
What function name happens after drawing?
Colors are specified using three numbers that represent what?
If a color is turned all the way OFF, what number is used?
If a color is turned all the way ON, what number is used?
A bit can hold what two numbers?
A byte is made up of how many bits?
A byte can hold how many different combinations of numbers?
5.12.2. Lab 2: Draw a Picture
Apply what you’ve learned here and use the drawing commands to create your own artwork in Übung 2: Zeichne ein Bild.