29. Platformers
Warning
This chapter is out-dated. See the Simple Platformer Tutorial. Step 9 is a nice starting point. For more advanced usage, see Platformer with Physics.
Ever wanted to create your own platformer? It isn’t too hard! Here’s an example to get started.
29.1. Map File
29.1.1. Creating The Map
First, we need a map. This is a “map” file created with the Tiled program. The program is free. You can download it and use it to create your map file.
In this map file the numbers represent:
Number |
Item |
|---|---|
-1 |
Empty square |
0 |
Crate |
1 |
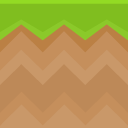
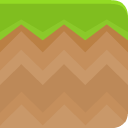
Left grass corner |
2 |
Middle grass corner |
3 |
Right grass corner |
You can download these tiles (originally from kenney.nl) here:


Of course, you’ll need a character to jump around the map:

Here is the map file:
1 2 3 4 5 6 7 | -1,-1,-1,-1,-1,-1,-1,-1,-1,-1,-1,-1,-1,-1,-1,-1,-1,-1,-1,-1,-1,-1,-1,-1,-1,1,2,3,-1,-1,-1,-1,-1,-1,-1,-1,-1,-1,-1,-1,-1,-1,-1,-1,-1,-1,-1,-1,-1,-1
-1,-1,-1,-1,-1,-1,-1,-1,-1,-1,-1,-1,-1,-1,-1,-1,-1,-1,-1,-1,-1,-1,-1,-1,-1,-1,-1,-1,-1,-1,-1,-1,-1,-1,-1,-1,-1,-1,-1,-1,-1,-1,-1,-1,-1,-1,-1,-1,-1,-1
0,-1,-1,-1,-1,-1,-1,-1,-1,-1,-1,-1,-1,-1,-1,-1,-1,-1,-1,-1,1,2,3,-1,-1,-1,-1,-1,-1,-1,1,2,3,-1,-1,-1,-1,-1,-1,-1,-1,-1,-1,-1,-1,-1,-1,-1,-1,0
0,-1,-1,-1,1,2,3,-1,-1,-1,-1,-1,-1,-1,-1,-1,0,-1,-1,-1,-1,-1,-1,-1,-1,-1,-1,-1,-1,-1,-1,0,-1,-1,-1,-1,-1,-1,-1,-1,-1,-1,0,-1,-1,-1,-1,-1,-1,0
0,-1,-1,-1,-1,-1,-1,-1,-1,-1,-1,-1,-1,-1,-1,-1,0,0,-1,-1,-1,-1,-1,-1,-1,1,2,3,-1,-1,-1,0,-1,-1,-1,-1,-1,-1,-1,-1,-1,0,0,0,-1,-1,-1,-1,-1,0
0,-1,-1,-1,-1,-1,-1,-1,-1,0,-1,-1,-1,-1,-1,0,0,0,-1,-1,-1,-1,-1,-1,-1,-1,-1,-1,-1,-1,-1,0,-1,-1,0,-1,-1,-1,-1,-1,0,0,0,0,0,-1,-1,-1,-1,0
1,2,2,2,2,2,2,2,2,2,2,2,2,2,2,2,2,2,2,2,2,2,2,2,2,2,2,2,2,2,2,2,2,2,2,2,2,2,2,2,2,2,2,2,2,2,2,2,2,3
|
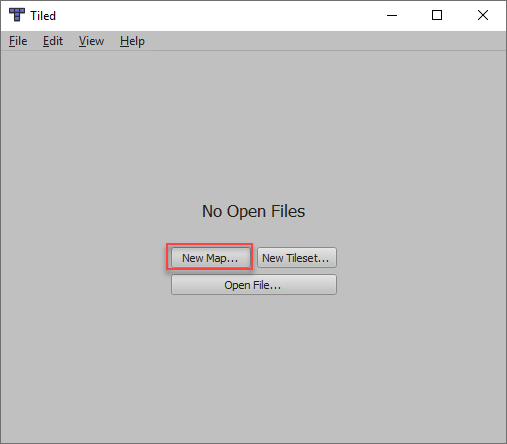
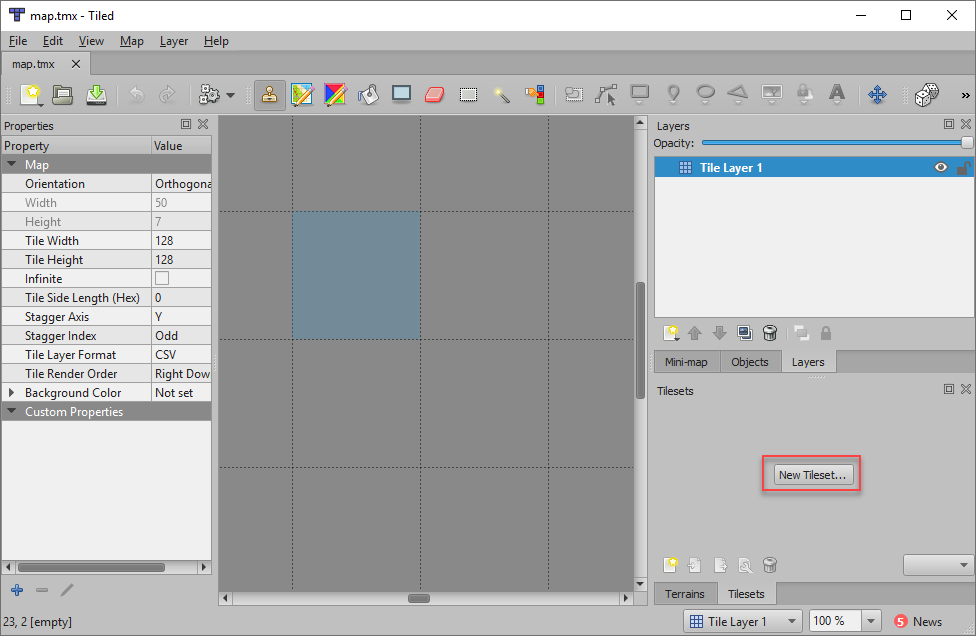
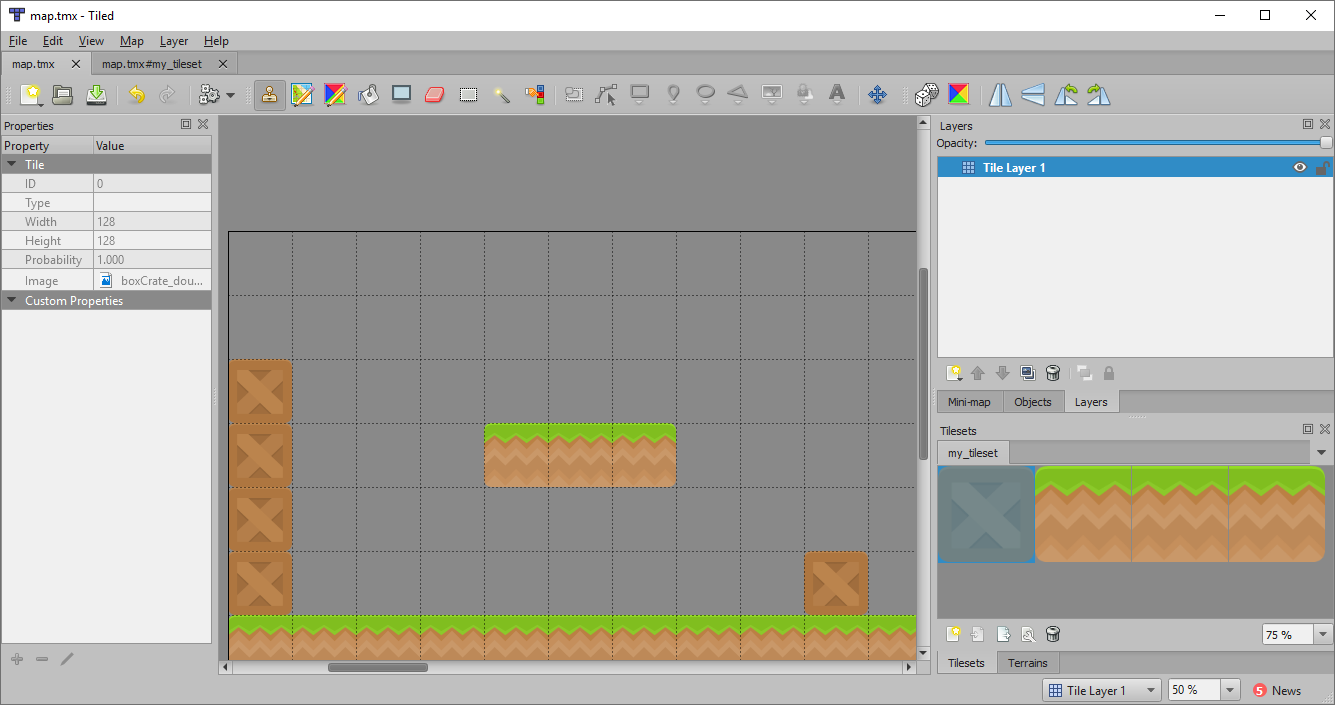
The Tiled program takes some getting used to. You start off with a screen like this, and you can create a new map here:
Then set up your map like this, adjusting the size of the map and the size of your images accordingly. (All your images need to be the same size. Don’t guess this number, look at the properties of the image and find how big it is.)
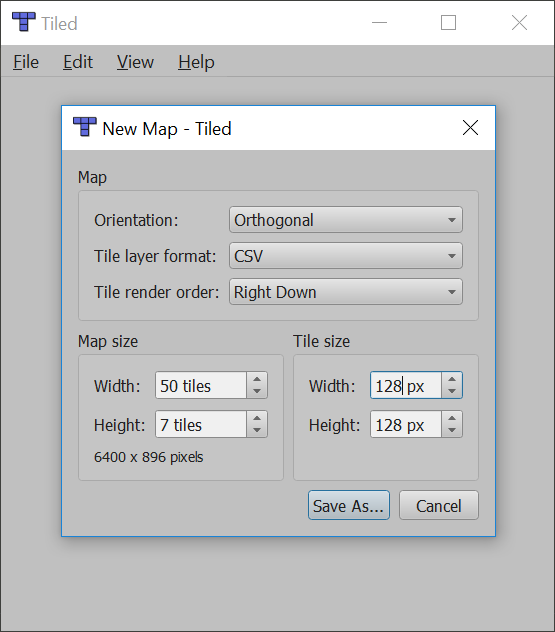
Most of the tiles from kenney.nl are 128x128 pixels. In the image above I’ve got a 7 tile high, by 50 pixel wide side-scroll map.
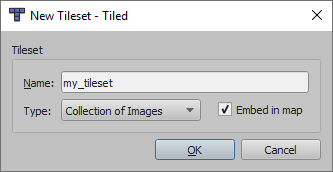
After this, you have to create a new “tile set.” Find the button for that:
I use these settings:
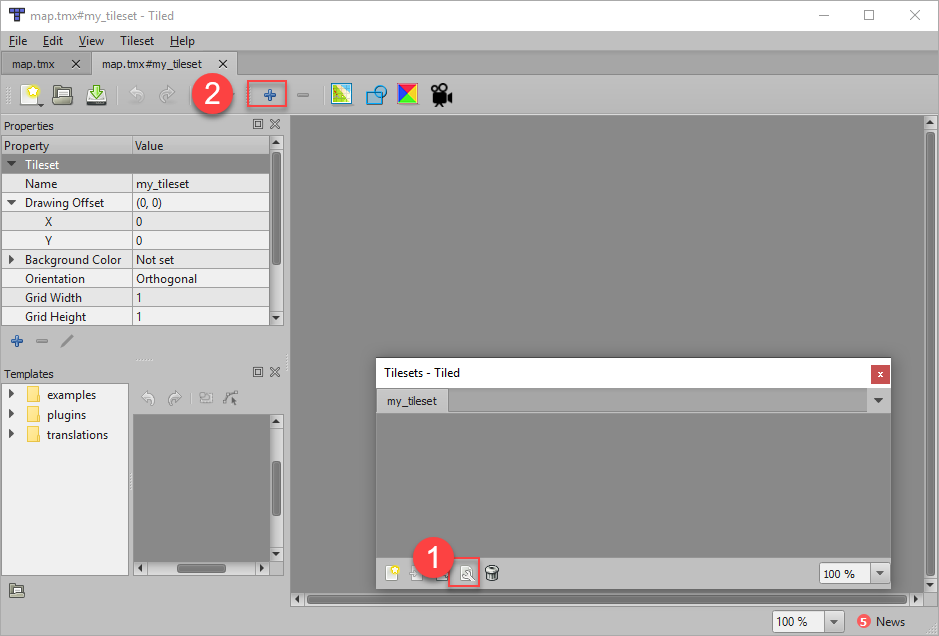
You can add the images as tiles to your tileset. I don’t find this obvious, but you click the wrench icon, then the plus icon:
These “tiles” will be all the images for your map, and the numbers they associate with:
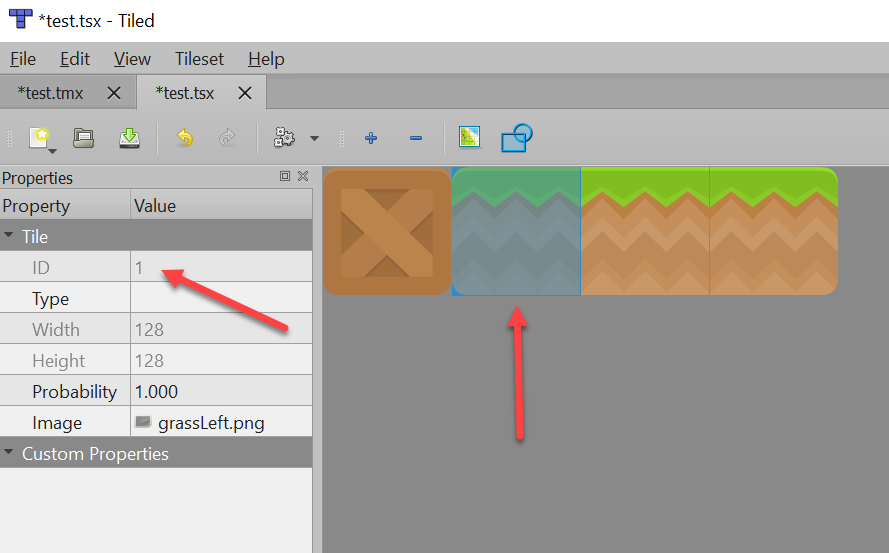
The numbers of the tiles correspond to the order you added the tiles. I don’t think you can change the mapping after you create the tileset.
Next, you “paint” your map:
When you are done, you can “Export as” a CSV file.
29.1.2. Reading The Map
Next, we want to read in this grid of numbers where each number is separated by a comma. We know how to read in a file, but how do you process a comma delimited file?
We’ve learned how to take a string and use the functions:
upper()lower()strip()
There’s another function called split(). This function will split apart
a string into a list based on a delimiter. For example:
1 2 3 4 5 6 7 8 | # A comma delimited string of numbers
my_text_string = "23,34,1,3,5,10"
# Split the string into a list, based on the comma as a delimiter
my_list = my_text_string.split(",")
# Print the result
print(my_list)
|
This prints:
['23', '34', '1', '3', '5', '10']
Which is close to what we want, except the list is a list of text, not numbers.
We can convert the list by:
# Convert from list of strings to list of integers
for i in range(len(my_list)):
    my_list[i] = int(my_list[i])
We haven’t covered it a lot, but you can also use enumerate to do the
same thing:
# Convert from list of strings to list of integers
for index, item in enumerate(my_list):
    my_list[index] = int(item)
Or use a list comprehension:
# Convert from list of strings to list of integers
my_list = [int(item) for item in my_list]
Python does have built-in code for working with csv files. If you want, you can read about the csv library in the official documentation.
29.2. Platformer Physics Engine
In prior chapters, we’ve used the PhysicsEngineSimple to keep from running
through walls. There’s another engine called PhysicsEnginePlatformer for
platformers.
This engine has two important additions:
Gravity
can_jumpmethod
29.2.1. Gravity
Creating the platformer physics engine requires a gravity constant. I recommend 0.5 to start with. This is your acceleration in pixels per frame.
self.physics_engine = arcade.PhysicsEnginePlatformer(self.player_sprite,
                                                     self.wall_list,
                                                     gravity_constant=GRAVITY)
29.2.2. Jumping
Also, you often need to know if there is ground beneath your character to know if she can jump. The physics engine has a method for this:
if self.physics_engine.can_jump():
    self.player_sprite.change_y = JUMP_SPEED
29.3. Python Program
In the highlighted code for the listing below, see how we’ve implemented these concepts to create a platformer
1 2 3 4 5 6 7 8 9 10 11 12 13 14 15 16 17 18 19 20 21 22 23 24 25 26 27 28 29 30 31 32 33 34 35 36 37 38 39 40 41 42 43 44 45 46 47 48 49 50 51 52 53 54 55 56 57 58 59 60 61 62 63 64 65 66 67 68 69 70 71 72 73 74 75 76 77 78 79 80 81 82 83 84 85 86 87 88 89 90 91 92 93 94 95 96 97 98 99 100 101 102 103 104 105 106 107 108 109 110 111 112 113 114 115 116 117 118 119 120 121 122 123 124 125 126 127 128 129 130 131 132 133 134 135 136 137 138 139 140 141 142 143 144 145 146 147 148 149 150 151 152 153 154 155 156 157 158 159 160 161 162 163 164 165 166 167 168 169 170 171 172 173 174 175 176 177 178 179 180 181 182 183 184 185 186 187 188 189 190 191 192 193 194 195 196 197 198 199 200 201 202 203 204 205 206 207 208 209 210 211 212 213 214 215 216 217 218 219 220 221 222 223 224 225 226 227 228 229 230 | """
Load a map stored in csv format, as exported by the program 'Tiled.'
Artwork from: http://kenney.nl
Tiled available from: http://www.mapeditor.org/
"""
import arcade
SPRITE_SCALING = 0.5
SCREEN_WIDTH = 800
SCREEN_HEIGHT = 600
# How many pixels to keep as a minimum margin between the character
# and the edge of the screen.
VIEWPORT_MARGIN = 40
RIGHT_MARGIN = 150
TILE_SIZE = 128
SCALED_TILE_SIZE = TILE_SIZE * SPRITE_SCALING
MAP_HEIGHT = 7
# Physics
MOVEMENT_SPEED = 5
JUMP_SPEED = 14
GRAVITY = 0.5
def get_map(filename):
"""
This function loads an array based on a map stored as a list of
numbers separated by commas.
"""
# Open the file
map_file = open(filename)
# Create an empty list of rows that will hold our map
map_array = []
# Read in a line from the file
for line in map_file:
# Strip the whitespace, and \n at the end
line = line.strip()
# This creates a list by splitting line everywhere there is a comma.
map_row = line.split(",")
# The list currently has all the numbers stored as text, and we want it
# as a number. (e.g. We want 1 not "1"). So loop through and convert
# to an integer.
for index, item in enumerate(map_row):
map_row[index] = int(item)
# Now that we've completed processing the row, add it to our map array.
map_array.append(map_row)
# Done, return the map.
return map_array
class MyWindow(arcade.Window):
""" Main application class. """
def __init__(self):
"""
Initializer
"""
# Call the parent class
super().__init__(SCREEN_WIDTH, SCREEN_HEIGHT)
# Sprite lists
self.player_list = None
self.wall_list = None
# Set up the player
self.player_sprite = None
# Physics engine
self.physics_engine = None
# Used for scrolling map
self.view_left = 0
self.view_bottom = 0
def setup(self):
""" Set up the game and initialize the variables. """
# Sprite lists
self.player_list = arcade.SpriteList()
self.wall_list = arcade.SpriteList()
# Set up the player
self.player_sprite = arcade.Sprite("character.png", SPRITE_SCALING)
# Starting position of the player
self.player_sprite.center_x = 90
self.player_sprite.center_y = 270
self.player_list.append(self.player_sprite)
# Get a 2D array made of numbers based on the map
map_array = get_map("map.csv")
# Now that we've got the map, loop through and create the sprites
for row_index in range(len(map_array)):
for column_index in range(len(map_array[row_index])):
item = map_array[row_index][column_index]
# For this map, the numbers represent:
# -1 = empty
# 0 = box
# 1 = grass left edge
# 2 = grass middle
# 3 = grass right edge
if item == 0:
wall = arcade.Sprite("boxCrate_double.png", SPRITE_SCALING)
elif item == 1:
wall = arcade.Sprite("grassLeft.png", SPRITE_SCALING)
elif item == 2:
wall = arcade.Sprite("grassMid.png", SPRITE_SCALING)
elif item == 3:
wall = arcade.Sprite("grassRight.png", SPRITE_SCALING)
if item >= 0:
# Calculate where the sprite goes
wall.left = column_index * SCALED_TILE_SIZE
wall.top = (MAP_HEIGHT - row_index) * SCALED_TILE_SIZE
# Add the sprite
self.wall_list.append(wall)
# Create out platformer physics engine with gravity
self.physics_engine = arcade.PhysicsEnginePlatformer(self.player_sprite,
self.wall_list,
gravity_constant=GRAVITY)
# Set the background color
arcade.set_background_color(arcade.color.AMAZON)
# Set the view port boundaries
# These numbers set where we have 'scrolled' to.
self.view_left = 0
self.view_bottom = 0
def on_draw(self):
"""
Render the screen.
"""
# This command has to happen before we start drawing
arcade.start_render()
# Draw all the sprites.
self.wall_list.draw()
self.player_list.draw()
def on_key_press(self, key, modifiers):
"""
Called whenever the mouse moves.
"""
if key == arcade.key.UP:
# This line below is new. It checks to make sure there is a platform underneath
# the player. Because you can't jump if there isn't ground beneath your feet.
if self.physics_engine.can_jump():
self.player_sprite.change_y = JUMP_SPEED
elif key == arcade.key.LEFT:
self.player_sprite.change_x = -MOVEMENT_SPEED
elif key == arcade.key.RIGHT:
self.player_sprite.change_x = MOVEMENT_SPEED
def on_key_release(self, key, modifiers):
"""
Called when the user presses a mouse button.
"""
if key == arcade.key.LEFT or key == arcade.key.RIGHT:
self.player_sprite.change_x = 0
def update(self, delta_time):
""" Movement and game logic """
self.physics_engine.update()
# --- Manage Scrolling ---
# Track if we need to change the view port
changed = False
# Scroll left
left_bndry = self.view_left + VIEWPORT_MARGIN
if self.player_sprite.left < left_bndry:
self.view_left -= left_bndry - self.player_sprite.left
changed = True
# Scroll right
right_bndry = self.view_left + SCREEN_WIDTH - RIGHT_MARGIN
if self.player_sprite.right > right_bndry:
self.view_left += self.player_sprite.right - right_bndry
changed = True
# Scroll up
top_bndry = self.view_bottom + SCREEN_HEIGHT - VIEWPORT_MARGIN
if self.player_sprite.top > top_bndry:
self.view_bottom += self.player_sprite.top - top_bndry
changed = True
# Scroll down
bottom_bndry = self.view_bottom + VIEWPORT_MARGIN
if self.player_sprite.bottom < bottom_bndry:
self.view_bottom -= bottom_bndry - self.player_sprite.bottom
changed = True
# If we need to scroll, go ahead and do it.
if changed:
arcade.set_viewport(self.view_left,
SCREEN_WIDTH + self.view_left,
self.view_bottom,
SCREEN_HEIGHT + self.view_bottom)
def main():
window = MyWindow()
window.setup()
arcade.run()
main()
|
29.4. Other Examples
If you are looking for platforms that move, see Sprite Moving Platforms.
If you are looking to be able to create ramps you can run up and down, see Sprite Ramps.